1989 TREK 330
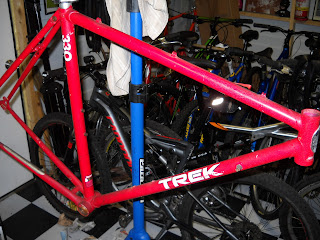
Trek 330 (when I found it)
I scored this Trek 330 in a package deal with a couple of other bicycles. It's missing the front wheel and saddle but I think I can make this into a really nice bike. This bike also sat in my shop until I could find the matching front wheel. The front wheel is a Weinmann 415X wheel with a concave rim. It took me about two years of searching and I finally found the matching wheel on Ebay. After I found the wheel I started to disassemble the bicycle.
These are some pictures before disassembly.
Trek 330 handle bar and forks.
Sugino crank and Suntour derailleur.
Suntour rear derailleur
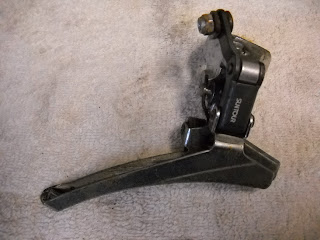
Suntour front derailleur
Suntour downtube shifters.
Front and rear Suntour side pull brakes.
These are some pictures before disassembly.
Trek 330 handle bar and forks.
Sugino crank and Suntour derailleur.
Suntour rear derailleur
Suntour front derailleur
Suntour downtube shifters.
Front and rear Suntour side pull brakes.
Bottom bracket and cranks.
Bottom bracket (cranks removed)
Headset and head tube.
Fork (before)
Fork crown.
The frame was very dirty . The top tube , down tube and bottom bracket shell had some black grime all over it. I tried cleaning it with some degreaser but it would not come clean. Also the frame had some paint spatter on the right side, probably house paint.
Frame (before cleaning and polishing)
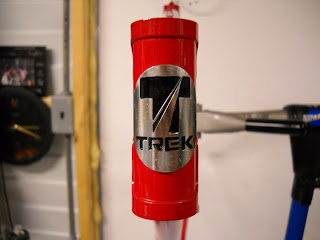
Head tube and head badge with paint overspray (before.)
Top tube (before cleaning and polishing.) Top tube also has some paint overspray.
Down tube and decals (before).
Seat stay (before)
Chain stay (before)
Rear dropouts (before)
Bottom bracket (before)
I used some Maguire's Ultimate compound to remove the black grime from the frame, the compound also made the dull paint shine again. Then I used Mothers carnuba cleaner wax to remove the house paint overspray from the frame. It took about four hours of rubbing the frame with carnuba wax but I finally removed all the paint over spray.
Frame (cleaned and polished)
Headtube (cleaned and polished)
Top tube (cleaned and polished)
Down tube (cleaned and polished)
Seat stay (cleaned and polished)
Chain stay (cleaned and polished)
Rear dropouts (cleaned and polished)
Bottom bracket (cleaned and polished)
Decal (cleaned and polished)
Fork (cleaned and polished)
Fork crown and decal (cleaned and polished)
Side of head tube (cleaned and polished)
Next I worked on the head set. The bearings were in good shape but the chrome was badly rusted. I cleaned the headset parts and soaked them in metal rescue. Metal rescue is a rust remover . I soaked the headset pieces for two days then I polished them with Turtle wax chrome cleaner.
Headset and bearings (before)
Headset (Cleaned and polished)
I then pressed the polished headset cups into the headtube of the bike.
Headset cups pressed in.
Next I greased the headset bearings and installed the fork.
Top headset cup and bearings.
Bottom headset bearings.
Headset installed.
Next I installed the fork and adjusted the headset.
Fork installed.
The stem and handle bars were next to clean and polish.
Stem and handle bar (before)
Stem (before)
I wet sanded the stem , using a 400 grit sand paper and moving through to a 2500 grit sand paper. After wet sanding I polished it with Mother's aluminum polish, then buffed to a nice shine.
Stem (before) exploded view.
Stem (cleaned and polished) exploded view.
Stem (complete)
Next I cleaned the old glue off the handlebars with some degreaser and a SOS pad. All the grime came off nicely and the sos pad polished the handle bar as well. When I was done I polished it with Mother's aluminum polish.
Handle bar (before)
Handle bar (cleaned and polished)
After cleaning and polishing the stem and handlebars I installed them on the bike. Both the stem and the handle bars are basic Trek issued components.
I still need to adjust the height of the stem . I will do that when I test ride the bike.
After completing the front end of the Trek I began to work on the cranks and bottom bracket.
These Sugino VP touring cranks are in great shape. They cleaned up nicely with some Mother's aluminum polish and some bronze wool. I took them apart and soaked the chain rings and bolts in Metal Rescue to remove the light rust, then cleaned and polished the cranks.
Sugino cranks (broken down)
Polished cranks (broken down)
Sugino cranks (cleaned and polished)
Next I worked on the bottom bracket. It is a square tapered axle with retainer bearings.
Bottom Bracket (before)
I cleaned and polished the bottom bracket components and then regreased the bearings.
After greasing the bearings I installed them in the bottom bracket shell and adjusted the bearings so it turns smooth.
Bottom bracket installed and adjusted.
After adjusting the bottom bracket I installed the Sugino crank.
The crank spins fast and smooth. This Sugino crank is a double crankset with 52X40 tooth chainrings which is great for this Trek 330 touring bike.
After completing the cranks I started on the brakes. They are Dia-Compe 5000 side pull brakes.
The brakes cleaned up well and shined up nicely. I used Mother's aluminum polish to to clean and shine the brake calipers.
Front and rear brake calipers (before)
Front brake (exploded view)
First I started with the front brake and moved in to the rear brake.
Front brake and parts (polished)
Front brake (reassembled)
rear brake (before cleaning and polishing)
Rear brake cleaned and polished (exploded view)
These Dia-Compe brake calipers received new brake shoes
Dia-Compe front and rear brake calipers (complete)
Front brake caliper (installed)
Rear brake caliper (installed)
After the brakes were done I started on the Derailleurs and shifters. This Trek 330 has Suntour front and rear friction shift derailleurs with down tube shifters. Friction shifters do not click into gear like index shifters, friction shifters have to be fine tuned into each cog of the gear you are shifting to. This is sometimes challenging when you are trying to find the right gear but you can fine tune your shifting to reduce chain rub while in gear.
Front derailleur (before)
I cleaned and polished both derailleurs and lubed the pivot points.
Front derailleur (cleaned,polished and lubed)
The rear derailleur had white lithium grease all over it. I took it apart ,cleaned and polished it . Then I put some lubrication in the jockey wheels and lubed all the pivot points.
Rear derailleur (before)
Rear derailleur (cleaned and polished)
Rear derailleur (polished and lubed)
Next are the Suntour Accushift levers.
Levers (before)
I used Mothers aluminum polish to clean these levers.
These levers polished up nicely.
Once I cleaned up and lubed the derailleurs I installed them on the Trek 330.
The front derailleur is installed above the crank. I made sure there was a 3mm gap between the bottom of the derailleur cage and the top of the large crank ring so the chain will shift up and down the chain rings without getting bound up between chain rings.
Rear derailleur (installed)
Suntour shift levers (installed)
The Dia-compe brake levers are silver and black with white hoods. The hoods were very dirty and could not be cleaned without damaging the rubber. I ordered some NOS hoods. The brake levers turned out very nice.
Brake levers (before)
Brake levers (broken down)
Brake levers (cleaned and polished ) new white hoods.
Brake levers (installed)
The wheels are the next components to work on. The rear wheel came with the bike. After searching for months I found a matching front wheel. These wheels are Weinmann 415X 700c wheels. I ordered a new tool to remove the rear cassette. I have many rear cassette removal tools but there is always a cassette which takes a different tool.
I removed the tire and the cassette from the wheel . then I trued the wheel.
Rear hub (before)
cassette (before)
Rear cassette (cleaned)
Next I cleaned the rim and hub with Mother's aluminum cleaner and polish.
Rear rim (cleaned and polished)
rear hub (cleaned and polished)
I cleaned up the axle and added new bearings and grease.
Rear axle hardware and bearings.
New bearings and grease.
Rear hub overhaul complete.
next I reinstalled the cassette.
rear wheel complete.
The front wheel needed a good cleaning. I also needed to true the wheel. It had a small wobble to it .This hub has sealed bearings that are in good shape .
Front wheel (before)
Front hub (cleaned and polished)
Front wheel (complete)
This Trek 330 is getting new brake and derailleur cables with white housing. First I installed the brake cables so I could adjust the brakes ,then I moved on to the derailleur cables.
I installed the wheels so I could adjust the brakes.
This bike also gets a new chain. After installing the chain I installed the derailleur cables and adjusted the front and rear derailleurs.
New KMC chain.
The seat post was next on my list of components to restore. It was dirty and the binder bolt had some light rust that I needed to remove.
Seatpost (before)
Seatpost binder bolt (before)
I cleaned the seatpost with degreaser and polished it with Mother's aluminum polish. I soaked the binder bolt in Metal Rescue to remove the rust and then polished it with Turtle wax chrome cleaner.
Seatpost components cleaned and polished .
Seatpost complete
Seatpost binder bolt (polished)
After completing the seatpost I installed a Trek touring saddle.
I installed white leather bar tape. White bar tape came standard in 1989 and I think it brings in the white decals and blends in well with the white brake housing.
White bar tape installed .
Next I wrapped the Weinmann 415X wheels in Vittoria Rubino Pro 700c tires .
New inner tubes.
Last component to work on is the pedals. I think these pedals originally had cages but I did not have any to reinstall so they are going on the bike the way they are.
I cleaned and polished both pedals then added new bearings and grease.
Pedals (complete)
Pedals installed.
These next pictures are of the finished Trek 330.
This bike was an interesting build . I had no idea Weinman made concave rims. I read that they were supposed to be stronger and lighter than convex rims. I think they look cool and handle well too. The white decals on red paint scheme looks nice as well. I took this bike for a spin around the neighborhood, the Vittoria Rubino tires are fast. The Suntour drive train shifted nicely for a 29 year old bike. The shifting technology has come a long way since then. This bike was a pleasure to ride the light frame helped this bike get up to speed quick and it took corners well. The Dia-Compe brakes stopped on a dime. This bike was a pleasure to restore and ride. Thanks for checking out my blog. Cheers Tony.


Great restoration! I still have my 89 Trek 330 I purchased new. I much prefer to ride my newer carbon steed, but still love the look of this Trek. Mine's in pretty good shape, but seeing your work is motivating me to clean up the old Trek! Again, great job!!
ReplyDeleteHi ,Thanks for checking out the Trek 330. I really like how steel Trek road bikes ride. It was a fun build and even more fun to ride. Tony
DeleteHello! I just bought an old Trek 330 and I'm about to start restoring it myself, so this page is a great resource, so thank you! I had a question for you regarding this part of your post:
ReplyDelete"I ordered a new tool to remove the rear cassette. I have many rear cassette removal tools but there is always a cassette which takes a different tool."
What specific cassette removal tool is need for this bike? Thanks again!