Diamondback BMX was founded in 1977 by Western States Imports out of California. They sold bicycles under the Centurion bicycle brand. Many professional BMX riders successfully competed under the sponsorship of Diamondback. They were one of the top BMX bicycle brands in the 1980's.
When I found this bike , it was missing the brakes ,cables and brake arms. The front wheel was missing spokes , the headset was loose and the wheels were out of true. The bottom bracket turned smooth. The rear wheel is a coaster brake wheel but I am going to convert it to a free wheel. There are videos on youtube showing how to convert a coaster brake to a freewheel. First I am going to start with the wheels, then I will move on to the rest of the bike.
Front wheel missing spokes.
I ordered new replacement spokes, they are 188mm
When the new spokes arrived , I installed them and trued the wheel.
Front hub before cleaning and polishing
Front wheel before polishing
Front wheel DB logo (before)
Front hub inside before cleaning
Front axle ,bearings and nuts before cleaning
Front hub cleaned and polished
Inside front hub cleaned and polished
Front hub with new grease , ready for the axle.
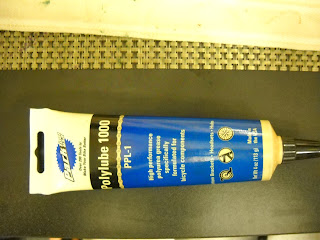
I use Park Tool bearing grease on all the bicycles I restore
I reinstalled the bearings with fresh grease
Front wheel complete
Next I started on the rear wheel. It needed to be trued as well
Rear coaster brake and hub.
Rear wheel before clean and polish.
I took the coaster brake apart and removed the brake shoes.
Rear sprocket, bearings ,nuts and brake shoes.
Coaster brake arm ,bearings and brake mechanism.
Rear hub (before)
I installed three washers in place of the brake shoes. The washers are there to take up the slack when the brake mechanism moves across the inside of the hub. I also removed the coaster brake arm and modified a washer to go in its place.
Three washers where the brake shoes were next to the brake mechanism
Modified washer to take place of brake arm
I put the washer in a vice and used a flat file and a round file to modify it.
Rear axle complete. Now it will act like a free wheel when you pedal backwards. I still need to clean and regrease the bearings .
Rear hub cleaned and polished
I regreased the hub as well as the rear sprocket bearings
Rear bearings and axle with new grease.
Rear hub cleaned, polished and complete.
Drive side
rear wheel polished
Next I removed all of the components from the bike and started cleaning the frame.
The paint is in good condition and the decals look ok. I am going to order new replacement spokes. Then I am going to taking the bike apart and start the restoration process.
Head Badge (before)
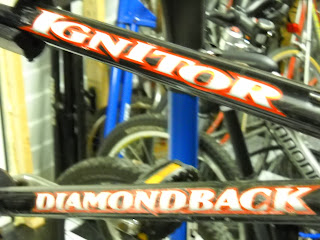
Ignitor decals
Bottom Bracket (before)
I removed the stem and handle bars. I removed the headset using a Park Tool headset wrench. I removed the bearings and the fork. I will clean and grease the head set bearings. Next I will remove the cranks and bottom bracket bearings.
Rear drop outs (before)
Rear seat stay and brake bosses (before)
cranks before cleaning and polishing
Frame with most components removed.
Next I removed the handlebars, stem ,headset and forks.
Rear view of fork (before)
Fork before cleaning and polishing
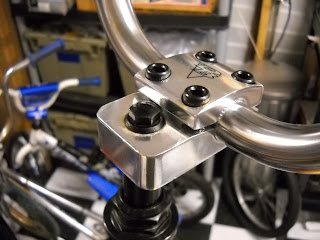
I removed the handlebars from the goose neck stem. then I polished the handle bars and broke down the goose neck for cleaning and polishing. I repainted the bolts for the goose neck and the stem.
Handle Bar (before)
Goose neck (before)
Before cleaning and polishing
Next I removed the headset hardware including the bearings , then I removed the headset cups from the frame.
.Headset hardware and bearings
I took the cranks apart , cleaned and polished the crank arm with TurtleWax chrome cleaner and polish. Then I cleaned and waxed the crank sprocket.
Cranks before cleaning and polishing
165 mm crank arms
The seat that was on the bike had rips on both sides so I was not able to reuse it. I found an X games saddle that will work perfectly on this bike.
old seat
New X games saddle
The pedals are going to get cleaned and regreased
When this bike was new ,it came with cantilever brakes. Unfortunately this one did not have hand brakes ,cables or a brake lever. I found some Shimano Altus cantilever brake arms off of a mountain bike that fit perfectly. I also had a brand new brake lever and brake cable that fit perfectly.
This bike originally came with Tektro brakes but these Shimano Altus brake arms fit perfectly
Brake parts
With all components off the bike . I am now able to clean and wax the frame. I start with a paint cleaner. Then I move on to a paint polish. Then I finish with carnuba wax and buff to a brilliant shine. After that I greased the headset and crank bearings. Then I started rebuilding the bike.
Bottom bracket cleaned and polished
cranks cleaned and polished
Crank bearings cleaned and ready for grease
Crank bearings greased
I use Park Tool Polylube for crank bearings and headset bearings.
Polished cranks installed
cranks with polished bottom bracket
I pressed in the headset cups using a headset press
then I regreased and installed the headset bearings
Goose neck polished and bolts repainted black.
I polished the fork then installed the headset and hardware.
DB Goose neck polished and shiny.
Handlebar installed
After I installed the handle bars, I finished the wheels. I wrapped the wheels in new Kenda Comp III style 26X2.125 tires. Then I cleaned and soaked the chain in synthetic oil for a couple of days. When it came out of the oil bath I dried it and installed on the bike along with the back wheel. I was also able to see how the freewheel worked . It pedals backwards smoothly.
Rear of bike... Notice no coaster brake arm in bottom picture.
Next I installed the Shimano Altus cantilever brake arms. I put some grease on the brake bosses to reduce friction when using the brake. I ran a new brake cable and housing along with a new brake lever.
New brake lever and cable.
Brake arms cleaned and polished.
The original grips still had the DB logo on them so I decided to keep them.
Next I cleaned the pedals. I removed the bearings and regreased them. Now they turn smooth.
both pedals have new grease
Pedals complete.
Thanks for viewing my blog. I hope it was informative to those who read it.
Stay tuned to more blogs to come.
Tony.


Beautiful mate
ReplyDeleteThanks , I love Diamondback BMX.
DeleteI’m buying this same bike this afternoon. It’s going to need restoration similar to this! I plan to use as a guide! Nice work!
ReplyDeleteNice work!! I scored the exact same bike yesterday. Thank for sharing.
ReplyDeleteI have the exact same bike in my garage! Anyone want to buy it? Fort Collins, CO 970-221-3703
ReplyDeleteThis was my very first Bmx bike as a kid and I would love to buy it. You can email me pics at ryanrowland23@yahoo.com
DeleteThis comment has been removed by the author.
ReplyDelete